how to make paint on a pumpkin dry faster
Place it in an open space with direct sunlight. Circulating the air where your paint is drying will increase the rate of evaporation for the water in the paint.

Pin By Miguelina Delgado On Crafty Craft Pumpkin Carving Pumpkin Decorating Pumpkin
Flip the slices every five hours for uniform drying.

. Then finish the rest of the pumpkin with a bigger brush. Its ok if your pumpkin looks light we are going to come back and add more color later. Once you are satisfied with the results add a final touch by placing the witchs hat on top of the.
Lift by the stem to remove from the bowl and allow excess paint to drip off. Epoxy primers are water resistant. Peppermint has antifungal properties which can help keep your pumpkin from molding.
Make sure that the temperature outside is 80F 90F or higher. Store in a dry shaded area. Check the gourds periodically to rotate them.
Acrylic paint is soluble in water and pumpkins have a lot of water in them. At this step we also added some cheek highlights and eyes for the spiders. Bake your stems in the oven at 200 degrees.
To eliminate paint all over the stem and to get right up next to it use a small brush for that detail work. 10242017 Once youre finished carving rinse the. Spread the slices out evenly on a tray and lay them in the sun to dry for about two days or until completely dry.
Try to picture yourself holding a flashlight on the left side of the pumpkin and seeing the edge of the holes you painted glowing from the reflection. Set up a wire rack or pallet in a cool dry location in your home. Or you can create your own washable mixture to use to paint your pumpkins this season.
Circulate air by turning on a fan. Dry for 5-7 days. After applying wax in sections very lightly wipe with a lint free rag.
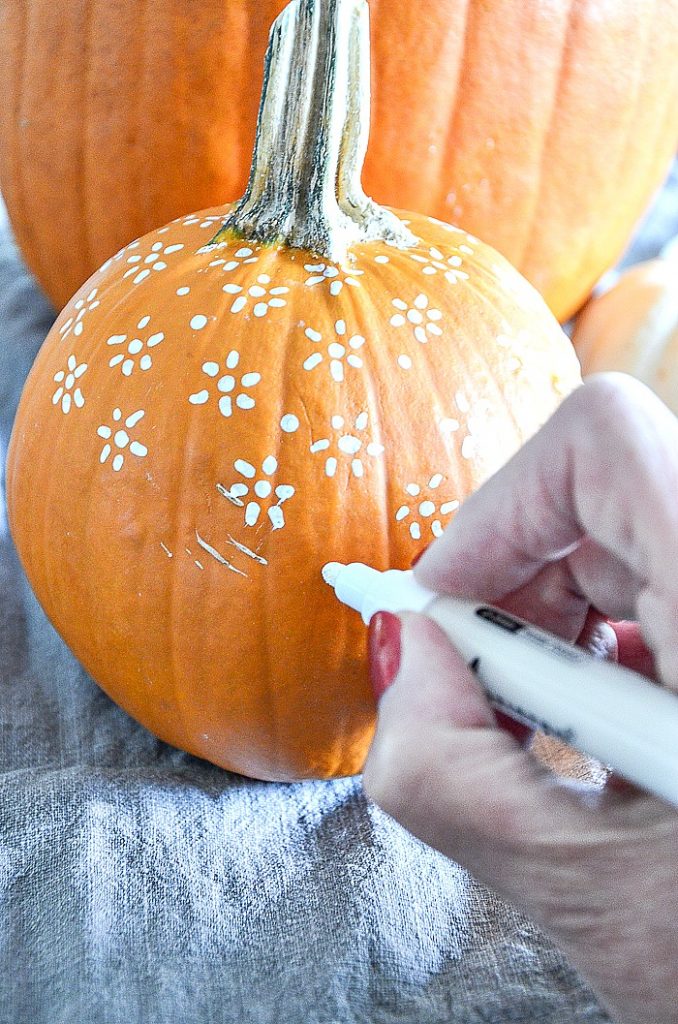
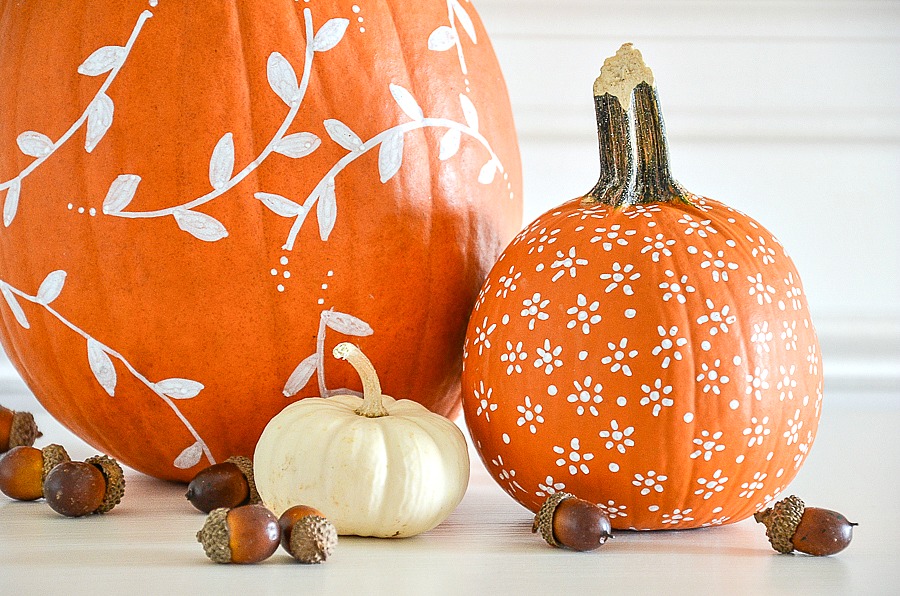
If you need to paint around the stem it is going to be hard to do that with a big brush. You want air to flow all around the pumpkins. Here using white wax and wax brush add the wax to the pumpkin.
Depending on how fast your paper dries its ok to use clean water to prewet your pumpkin area to keep your pumpkin from drying before you are done painting it in. Decide upon the desired color for each pumpkin before you begin painting. Cut the skin from the pumpkins and cut the flesh into slices.
Turn on ceiling or floor fans to a medium speed in the room where your paint is drying. Use the gray-blue paint mixture to draw out the base of the pumpkin. Place the pumpkins on the rack and make sure there is space between each pumpkin.
Theres no clear recipe so remember to have fun when applying the glow-in-the-dark paints. Use a paper towel to dab on your second paint color. Just place all your stems on an old cookie sheet and bake them in the oven for 2-3 hours at 200 degrees.
Remove and allow the pumpkin to air dry. I say lightly because you want the white wax to stay adding to the real pumpkin look. Dip just the bottom quarter of your pumpkin for a small dose of color or submerge it three-quarters of the way up for a bolder look.
Paint primer is an intermediary paint that coats a surface and once dry it allows another paint to be painted overtop of it. You can also use a rag to smear off some paint and create a cool effect. Bring the tray inside at night.
This will make your pumpkin last a lot longer. Using a foam paint brush. Heat from the sun can cause pumpkins to decompose faster.
Mix together 12 ounces of water with 10 drops of peppermint oil. Paint the whole pumpkin with Multi-Purpose Sealer figure 1. Add the white wax a bit at a time and work it into the paint well with your brush.
In your case I would try an epoxy primer to coat the surface of the pumpkin. Immediately discard any pumpkins that have mold or rot. General tips for painting your pumpkin.
Make sure to let the paint dry off completely before adding a new color. Dip the pumpkin on a diagonal for an extra graphic takeyou can even coat your pumpkins twice as a way to layer colors. But before applying your acrylic paint you need to first coat the dried expoxy primer with a sealant.
Use two different sized brushes. Bring the tray outside. Paint on your base coat.
Spray your pumpkin at least once each week especially around the carved edges. To give the pumpkin more of a 3-D effect use white acrylic paint and outline only the right sides which imitaties light reflecting. This will prevent the cool air to condense and add moisture back to the pumpkin slices.
I have found that that this is a good amount of time to dry out the stems. Avoid direct sunlight which can bleach the color. Steam the pumpkin slices in a steamer or in a pot on the stove top for six minutes.
So whats the real secret to drying out pumpkins stems quickly.

Creepy Pumpkin Tutorial Made With Cotton Balls And Modge Podge Creepy Pumpkin Pumpkin Fake Pumpkins

White Painted Pumpkin Diy Stonegable

Pumpkin Decorations Pumpkin Painting How To Paint A Pumpkin Diy Pumpkins Painting Fall Pumpkins Painting Painted Pumpkins

White Painted Pumpkin Diy Stonegable

Garfield Painting Painting Using Acrylic Paint Artwork
White Painted Pumpkin Diy Stonegable

How To Paint Pumpkins On Canvas Step By Step Painting Fall Canvas Painting Fall Canvas Painting Crafts

What Type Of Paint Sticks To Paint Pumpkins Ehow

Art Projects For Kids Halloween Crafts Pumpkin Decorating Halloween Pumpkins

49 Easy Pumpkin Painting Ideas To Try This Year Decorating Pumpkins Without Carving Pumpkin Decorating No Carve Pumpkin Decorating

How To Paint Pumpkins The Right Way Scraplifters Com Pumpkin Painting Party Pumpkin Halloween Pumpkins Painted

Candy Corn Pumpkin Fast And Easy Way To Decorate A Pumpkin No Carving Needed Easy Pumpkin Decorating No Carve Pumpkin Decorating Pumpkin Decorating Contest
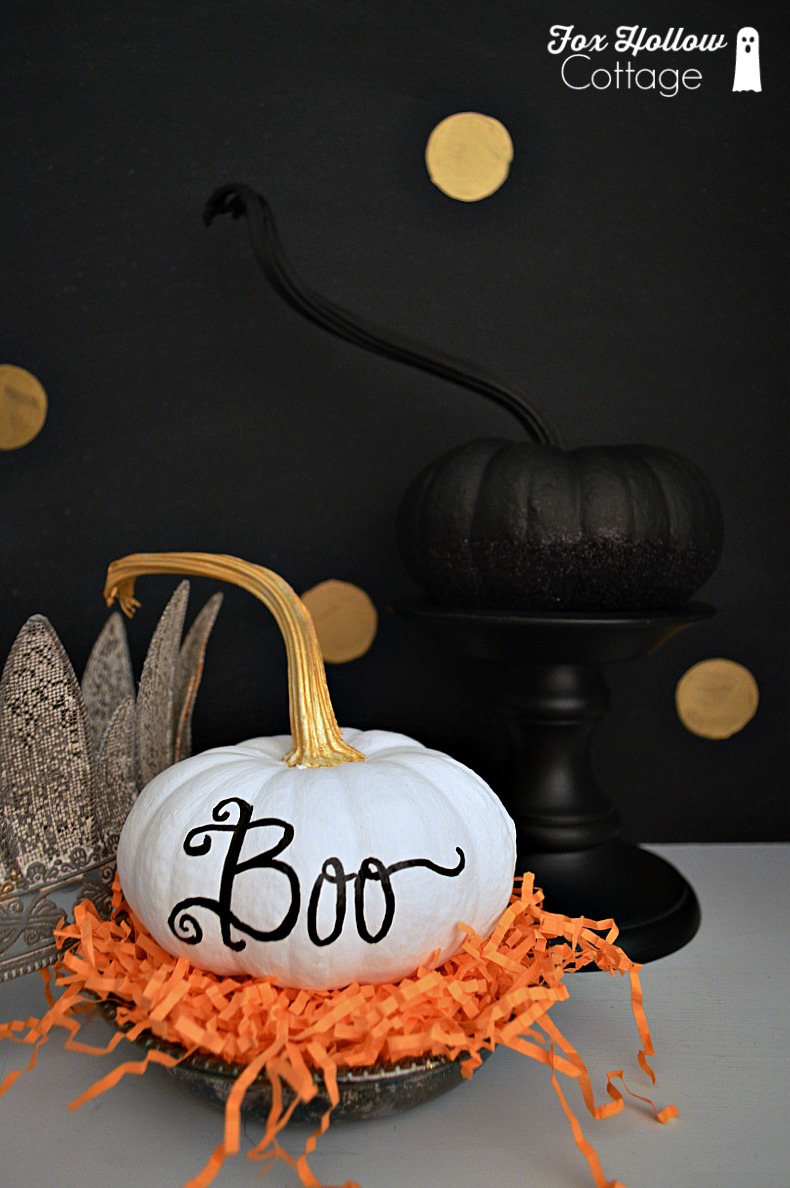
Painted Pumpkins Plus Tips For Great Results Fox Hollow Cottage

Pumpkin Orange Deep Space Black Plutonium Paint Plutoniumpaint Twitter Pumpkin Spray Paint Diy Spray Paint Spray Paint Projects

How To Get An Aged Zinc Look Fall Diy Fall Crafts Crafts

The Best Painted Pumpkin Ideas From The Martha Stewart Living Staff Painted Pumpkins Pumpkin Halloween Decorations Pumpkin Decorating

Diy Faux Mercury Glass Pumpkins With Foam Pumpkins Foam Pumpkins Glass Pumpkins Fall Decor Diy
Painting Shop Passes Brush To Amateurs The Baylor Lariat Fall Canvas Painting Fall Pumpkins Painting Halloween Painting
White Painted Pumpkin Diy Stonegable